A guide to professional air conditioning installation

Air conditioning installation involves calculating the thermal load of a space, selecting a system with appropriate kilowatt capacity, and integrating it with the home's electrical and structural framework. For most Australian homes, this requires a licensed technician to handle refrigerant gasses and ensure the electrical supply meets AS/NZS 3000 standards for safety and performance.
Why electrical capacity dictates your installation options
Before a single bracket is mounted, the electrical supply of the property must be analysed. Most older homes were built with single-phase power, which typically provides enough current for lighting, basic appliances, and perhaps one large appliance like an oven. When you introduce a high-capacity ducted air conditioning system, the current draw can exceed the available capacity of an aging switchboard. A 14 kW ducted system may require a dedicated 32-amp circuit, which often necessitates a switchboard upgrade to include modern RCDs (Residual Current Devices) and potentially a mains power upgrade. In contrast, a small 2.5 kW split system air conditioning unit used in a bedroom might only pull 10 amps, making it a viable option for homes where a full electrical overhaul is not budget-friendly.
If your home is large and requires multiple high-capacity units, three-phase power becomes a necessity rather than an option. Three-phase power distributes the electrical load across three wires instead of one, which allows for more efficient operation of large compressors and prevents the flickering of lights when the system starts up. We check the incoming mains and the consumer mains—the cables connecting the street to your board—to ensure they can handle the projected load. If the cables are too thin, they will heat up under load, leading to voltage drops and potential fire hazards. This technical assessment is the first step in any professional installation because the most advanced unit in the world cannot function safely without a stable power supply.
Managing structural constraints in existing homes
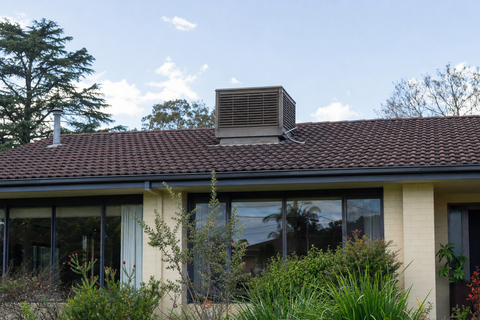
Installing air conditioning is as much about carpentry and roofing as it is about refrigeration. In a home with a dark tiled roof in a hot dry inland zone, the roof cavity temperatures can regularly exceed 65 degrees Celsius in mid-summer. This heat stress affects where the indoor fan coil unit can be placed and how the ducting is run. We look for a central location in the roof space that allows for the shortest possible duct runs, which minimises friction loss and thermal gain. However, the placement is often limited by the internal structure of the roof. Trusses in modern homes are engineered to specific load-bearing points, and cutting through them to fit a large indoor unit is not an option without expensive structural reinforcement.
Wall construction also dictates the installation method. A brick veneer home allows for pipes to be run within the wall cavity, resulting in a cleaner finish. Double brick homes, common in older suburbs, often require external PVC trunking to house the refrigerant lines and drain pipes because chasing into solid brick is labor-intensive and messy. We also consider the R-value of the existing ceiling insulation. If a home has thin or non-existent insulation, the air conditioning system will have to work significantly harder to overcome the heat radiating through the ceiling. Recommending an insulation top-up alongside an installation is a common trade-off that can allow for a smaller, more efficient unit to be used, saving the homeowner money on both the hardware and the ongoing running costs.
The technical reality of refrigerant pipe runs
The connection between the indoor and outdoor units is made via a pair of insulated copper pipes known as the line set. These pipes carry the refrigerant that moves heat out of your home. The length and rise of these pipes are critical to the system's longevity. Every manufacturer specifies a maximum pipe length and a maximum vertical lift. If the outdoor unit is placed on a roof two storeys above the indoor unit, the compressor must work against gravity to push the oil back up the line. If the oil cannot return to the compressor, the mechanical parts will eventually seize. In these scenarios, we install oil traps or choose systems with high-lift compressors specifically designed for vertical separation.
During the installation, the copper pipes must be joined using a process called flaring or brazing. Any moisture or air left inside the pipes will react with the refrigerant and oil, creating acid that eats the compressor from the inside out. This is why we use a vacuum pump to remove every trace of air and moisture before releasing the refrigerant. We monitor this process with a digital micron gauge to ensure the system is truly dehydrated. It is a time-consuming step that some budget installers skip, but it is the difference between a system that lasts fifteen years and one that fails in five. For those looking to bundle multiple rooms, exploring package deals can often offset the cost of these higher-quality installation practices.
Condenser placement and environmental factors
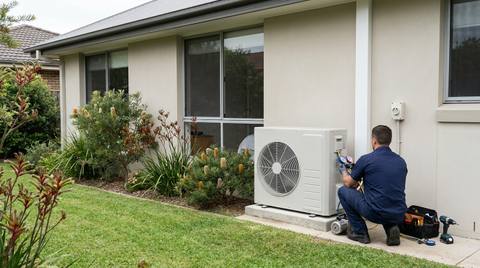
The outdoor unit, or condenser, needs to breathe to work effectively. It works by blowing hot air away from the house, so if it is tucked into a narrow side passage with less than 600mm of clearance, the hot air will recirculate back into the unit. This causes the head pressure to skyrocket, forcing the system to consume more electricity while providing less cooling. In a humid coastal climate, the condenser is also at risk from salt spray, which can corrode the aluminium fins on the heat exchanger. In these locations, we specify units with protective coatings on the coils to prevent premature failure.
Noise is another factor that moves the location of the outdoor unit. In many areas, local council regulations specify how many decibels a unit can produce at the boundary line, especially at night. Placing a large condenser right outside a neighbour's bedroom window is a recipe for dispute. We often recommend mounting the unit on rubber vibration pads or a weighted plastic base to decouple the mechanical vibration from the ground or the wall. This is particularly important for lightweight cladding or timber-framed homes where the structure can act like a drum, amplifying the hum of the compressor throughout the house. A professional air conditioning service schedule later in the unit's life will also help maintain these noise levels by ensuring the fan motors remain balanced and the mounts intact.
Indoor unit positioning for airflow and efficiency
The placement of the indoor unit determines how well the air circulates through the room. In a bedroom, the ideal spot is usually above the bedhead or on a side wall where the air doesn't blow directly onto the occupants, which can be uncomfortable during sleep. For split systems, the unit must be mounted high enough to allow the cool air to fall and displace the rising warm air, but with enough clearance from the ceiling (usually 100mm to 150mm) to allow for adequate return air intake. If the unit is too close to the ceiling, it will starve for air, causing the fan to work harder and the evaporator coil to potentially freeze up.
Drainage is the most common cause of post-installation issues. Every air conditioner produces condensation as it cools the air, and this water must be drained away via gravity. If the wall doesn't allow for a natural downward slope to the outside, we have to install a small condensate pump. These pumps are effective but add a mechanical point of failure and a slight clicking noise. We always prefer a gravity drain where possible. In ducted installations, we use a secondary safety tray under the indoor unit. If the primary drain blocks due to dust or debris, the safety tray catches the overflow and directs it to a visible point outside, such as over a window, to alert the homeowner that the system needs maintenance before the ceiling is damaged.
Commissioning and the final testing phase
A professional installation is only complete once the system has been fully commissioned. This isn't just a matter of turning it on and feeling for cold air. We use a manifold gauge set to check the operating pressures and ensure they match the manufacturer's specifications for the current outdoor temperature. We also measure the 'delta T'—the temperature difference between the air entering the unit and the air leaving it. A healthy system should typically see a drop of 10 to 12 degrees Celsius across the coil. If the drop is too low, it may indicate a refrigerant undercharge; if it is too high, it could mean the airflow is restricted.
In ducted systems, commissioning also involves balancing the air dampers. Not every room requires the same volume of air. A west-facing lounge room with large glass windows will need significantly more airflow than a small, shaded south-facing bedroom. We adjust the manual or electronic dampers in the roof space to ensure each room reaches its set point at roughly the same time. We also check the current draw of the compressor against the nameplate rating to ensure the electrical circuit is not being stressed. This data is recorded as a baseline, which is invaluable for any future technician performing a service, as it allows them to see exactly how the system performed on day one. A Darwin install fights humidity where a Canberra one fights winter, and the commissioning process must account for these specific environmental loads to ensure long-term reliability.
Common questions
How long does a typical air conditioning installation take?
A standard back-to-back split system installation usually takes between three and five hours. A full ducted system installation for a standard four-bedroom home typically requires a full day with a team of two or three technicians, depending on roof access and electrical requirements.
Do I need to upgrade my switchboard for a new air conditioner?
It depends on the age of your home and the capacity of the new unit. Modern systems require dedicated circuits and RCD protection. If your board uses old ceramic fuses, an upgrade is mandatory to meet current safety standards and handle the increased electrical load.
Can I install an air conditioner myself?
No. In Australia, it is illegal to handle refrigerant or perform fixed electrical wiring without the appropriate licenses. Unlicensed installation voids your warranty, can lead to heavy fines, and poses significant safety risks including fire and refrigerant leaks.
What is the best location for the outdoor unit?
The outdoor unit should be placed in a well-ventilated area, ideally on the shady side of the house. It needs clear space for airflow and should be easily accessible for future maintenance while being far enough from bedroom windows to minimise noise disturbance.
Why is a vacuum pump used during installation?
A vacuum pump removes air and moisture from the copper refrigerant lines. Moisture in the system can freeze and block the expansion valve or react with the oil to form acid, which causes terminal damage to the compressor. A deep vacuum is essential for system longevity.